Five Home Decor Hacks for an Afternoon
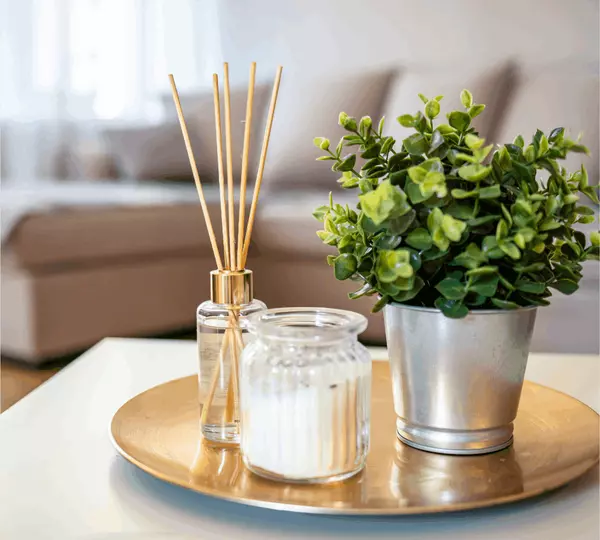
Do you struggle with decorating your home? Do you love HGTV, but think I can’t decorate like a professional? Well, with these hacks you’ll be hitting up Home Goods, At Home, and any other decor store near you. Professional designers recommend even minor updates to a house, which make a significant impact. What are those updates you can make quickly and not spend the entire weekend working on? Here are all five: 1. Switch Out Linens Every home benefits from a pop of color or accent color throughout. A quick way to achieve that is updating linens such as throw pillow covers, towels, or throw blankets. At times, this may be costly to the homeowner. Combat this by focusing on a half bath that is smaller but that many people utilize or shop online for textiles that are on sale. Budget-friendly throw pillow covers are available online from $5 to $20. 2. Add A Touch of Curb Appeal When friends stop by or the Amazon delivery person drops off a package, what is the first thing they see? Is the doorknob old and outdated? Swap it out with a new doorknob that suits the aesthetic of the home better. Is there somewhere for a delivery package to be hidden? No? Place a decor item that is large enough by the front door, which improves the look of the home and provides a functional purpose. No more porch pirates taking your packages. 3. Upgrade Lighting Lightbulbs are of critical importance. Are you going after an industrial look where Edison bulbs would be appealing?Are you wanting a room to appear brighter?Consider lightbulbs that are a brighter white than a soft white and vice versa. Strategically, you may place lights in corners or under cabinets to give an extra touch of appeal. Also, consider putting lighting within shelves to give decor and pictures a spotlight. 4. Outlets of the Future Did you buy the home years ago and the plates reflect that? Is an outlet missing a screw or two? Outlets of the future now include usb ports or smart ports. Now, these outlets are wonderful to have, convenient, and an extra selling point that goes a long way. Are you wanting to stick with conventional and aren’t into electronics as much? A quick update to the outlet plates by purchasing updated conventional plates goes a long way from your standard white new build outlet plate install. Grab your screwdriver and put the new outlet covers on in less than two hours. 5. Use a Faux Book Cover to Hide Internet Equipment Internet routers, streaming devices, and other electronics can be an unsightly necessity on your shelves and furniture. Hide them by taking the pages out of an old hardback with a classic cover. A book that is slightly bigger will provide a touch of decor and prevent overheating the electronic. Old hardbacks can be found at garage sales, antique stores, or used book stores. To remove the pages, find a book with a softer spine. Once purchased, open the cover and cut along the seam that connects the cover to the book with a sharp knife or carpet cutter. Consider stacking other books to give an appealing look or provide a frame or decorative candle on top. With these five home decor hacks, you could have a slightly updated house in a Sunday afternoon. Do one or all five and see how far these simple updates go. For more home decor insight, stay tuned.
Read MoreFast Decluttering Mini-Projects
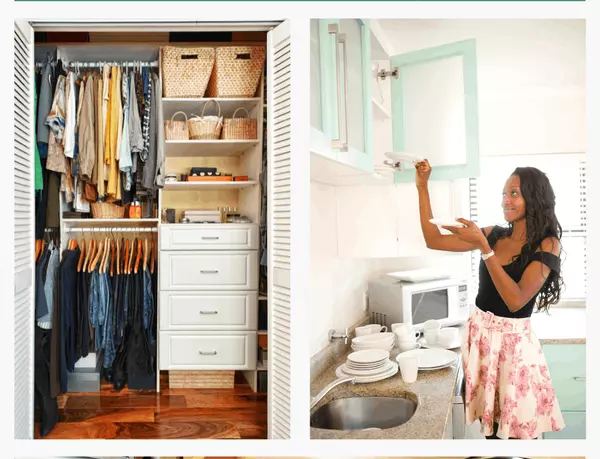
Heading into the holiday season and getting ready to settle into the rhythm of a new year (how is it here already?!), it’s the perfect time to declutter. Even though you probably don’t have the time to dedicate to a whole house declutter, you can make real headway with a few minutes here and there each day. Set a timer, put on some holiday music and try one of these fast decluttering mini-projects. Kitchen Go through all your storage containers, to go containers, and throw out any that are cracked, melted, or otherwise unusable. Additionally, throw out any lids or containers that don’t have a mate. Check the expiration dates of the condiments sitting in the door of your fridge, and throw that mayo out that’s older than the Queen of England. Take an inventory of the utensil drawer and get rid of any utensils that are past their prime. Bathroom Tackle your shower and get rid of any products that are expired or that you just don’t use. If you haven’t used it in the last 6 months, throw it out. Bathrooms are generally scarce on storage, so you don’t want to waste any of your space storing an unused body scrub you got at a white elephant party. Next, go through your medicine cabinet, purse, and/or makeup bag and get rid of any expired medications, products, and old makeup. Also, throw out that nasty mint at the bottom of your bag (no one wants that). Laundry Room Have you looked at your laundry room shelves recently? No? Well, there’s probably an old, used up bottle of detergent or fabric softener hanging around up there. No shame, everyone has one. Now’s your chance to get rid of it. Do you have a pile of socks that are missing their mate? If you haven’t found it in 3 months, it’s not going to show up, empty that pile of socks. Entryway You probably have a table or an area on the counter where you put things after you get home. Go through this area and get rid of any loose papers, old magazines, or random junk. Bonus task: go through the keys laying around to make sure you still need all of them. With just a few minutes, you can make a big difference in the feel of your home. Finding the motivation to declutter is difficult, but once you do it, you’ll feel lighter. And when you break decluttering into mini-projects, it makes the task much more manageable. And of course, decluttering is one of the first steps in getting your home prepped for a sale. If you want to get started with the rest of the home selling process, send us an email or call us!
Read MoreFour Ideas to Reclaim the Garage
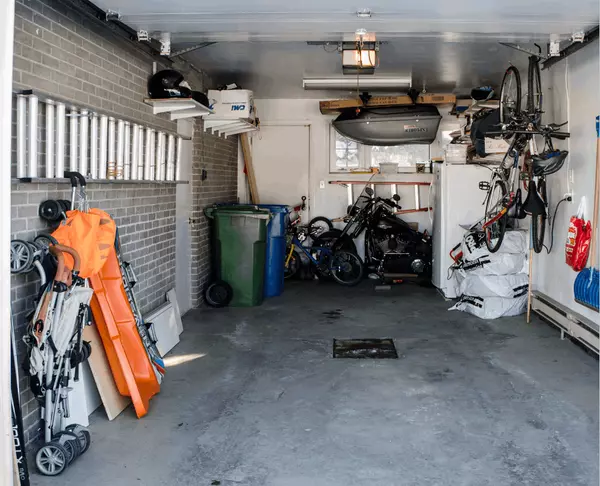
Garages get full fast, especially after an eventful summer season. Before you know it, you are staring at skateboards on the ground, bikes falling on top of each other, and is that Grandma’s sewing machine in the corner? Now is the perfect time to organize the garage before the colder months are here and you can get out those last minute holiday decor items. 1. Declutter To truly organize a space, you have to get rid of the junk taking up space. Pull everything out and be honest with yourself about what you really need to keep, what you need to donate, and what can be tossed in the rubbish. Pay special attention to your outdoor and summer equipment, and fix anything that needs to be repaired or take it to the shop to be repaired. If purchasing new is more financially suitable, throw out the broken item. Pro tip: If you find yourself with a lot of items to get rid of, this is a great time for a yard sale! 2. Categorize Once you’ve scaled down and have the things you want to keep, categorize them. Put your cleaning supplies with cleaning supplies, tools with tools, recreation equipment with your outdoor stuff. Categorizing will help limit the clutter because you’ll know exactly where everything is and when you go to find it, theoretically it will be waiting for you in it’s spot. 3. Contain After categorizing items, put the smaller items in smaller containers and LABEL them. I love the black storage boxes from Costco because they’re so sturdy, but clear bins are also great because you can see exactly what’s in them. Label containers so you know, whether you are opening Christmas decor or a box full of pool toys. 4. Store Your garage might not have a lot of built in storage, so go vertical. Wall pegboards are cheap and easy to use, making them perfect for tools and outdoor gear. Open shelves made from steel are great to store bins and heavy equipment. You can even buy shelving on Amazon that snaps together but is surprisingly sturdy. Do you want to keep hazardous tools or chemicals away from kids and pets? Think about purchasing cabinetry with child safe locks. If you have the budget, overhead ceiling racks are an amazing way to reclaim the floor. They’re like shelving for your garage ceiling and are perfect for storing seasonal items like decorations or camping gear. Also, bikes can be stored vertically on a wall mount or from the ceiling on a pulley system. With a little bit of time and elbow grease, you can turn that garage nightmare into a useable space in no time!
Read MoreSimple Steps to a Magazine Worthy Kitchen
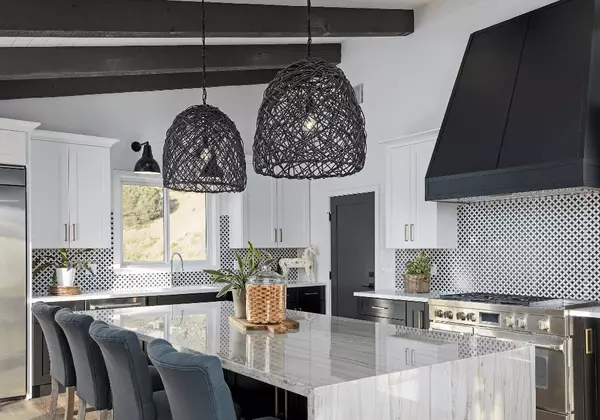
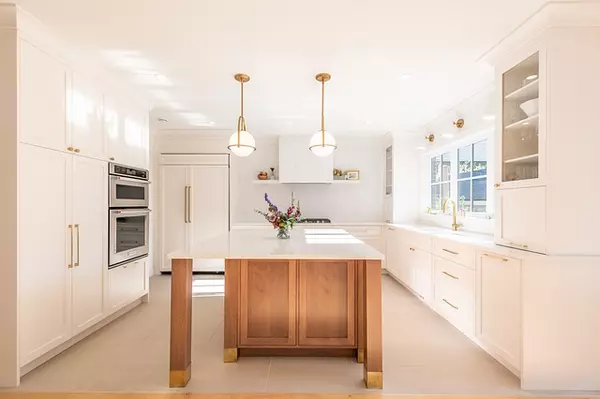
Do you look through home magazines and think, “I want that kitchen”. Don’t we all? Well, your path to a streamlined, organized kitchen starts with a couple of simple tasks: cleaning and organizing. Organizing your kitchen may seem like a daunting project, but with a few daily goals and tasks it’ll be complete before the new year. Storage Begin with the cabinets and drawers. Start by getting rid of dinnerware, pans, utensils and appliances you don’t use or that don’t have matching lids or bottoms. Consider adding drawer organizers to areas that get messy fast (like a utensil drawer). After you’ve weeded through and and organized, use a cleaning spray to wipe down the cabinet exteriors and interiors, drawers, and any open shelving. Restarting with a fresh surface will help the appearance and experience for days to come. Pantry Time to see what kind of cans are lurking at the back of the shelves. Does your pantry look like a doomsday prepper’s basement? Choose a section and start by pulling everything out. Toss the expired food, and if there’s anything that’s still good but that you won’t use, put it in a bag to donate to a food pantry. Wipe down your shelves and bins as you go and replace any shelf paper as needed. Taking snacks and items out of their original packaging and putting them in clear bins or baskets with labels will help the aesthetic of the pantry and you’ll know when they need refilling. Those teens won’t be leaving empty boxes of Swiss Cake Rolls any longer. Sinks and Counters Take everything off the counters and decide if it needs to stay on the counter. If you only use your blender on holidays and occasional date nights in, you can probably store it in one of your newly organized cabinets. Deep clean your sink, faucet, drain, and garbage disposal. Appliances Finish off your clean-a-thon by giving your hardworking appliances some love. First, check your fridge and freezer and throw out anything expired and things you know won’t get eaten. Once it’s good to go, clean the inside and outside of your refrigerator, and pull it out from the wall to vacuum behind it. Yay for increased energy efficiency! Next, tackle the stove by degreasing the stovetop and running the oven cleaning setting. If you have a hood, degrease that as well. Then wipe down the outside and inside of the microwave. Finish off by running the dishwasher with a cup of white vinegar to descale the interior. Now your kitchen is pristine, clean, and organized. In fact, that’s just the sort of kitchen buyers are looking for. Want to show off your kitchen and see what your home could score in our hot market? Send us your kitchen pictures and request a home evaluation by us.
Read More-
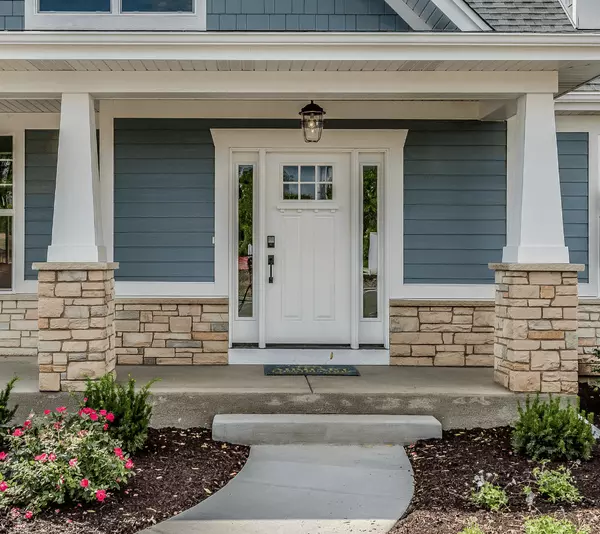
Looking to add style and function to a front entrance? Replace old hardware. house numbers, entry door lockset, wall mounted mailbox, or an overhead light fixture. All of these instantly improve the outside of a home. Make a statement by giving your front door a coat of color with paint or by installing a custom wood door. Clean off any dirty spots around the knob, and use metal polish on the door fixtures. Get foliage in shape by pruning growth, pulling weeds, and planting flowers. Add new mulch or landscaping rocks to combat what weather and time have done to ground cover. 5 Tips To Boost Curb Appeal 1. Complete an InvestigationPretend you are a buyer, walk and drive by the house. What good and bad things catch your eye? You can even stand out front of the home, take a photo, and then look it over and ask yourself if this was in a magazine what would stand out to you and what would you want to change? 2. Add Exterior Touches Minor additions to the exterior go a long way and are relatively simple and affordable. A new mailbox or address numbers, can make a home stand out from the rest and give an extra bit of personality. 3. Paint Exterior Adding a fresh new coat of paint can revive the appearance of a home. Paint the trim, touch up discolorations, and use neutral colors. Often the weather over time drastically impacts the front facade of a home. If you are in an HOA, consult the HOA prior to painting and make sure the colors you want are approved. 4. Use a Pressure-Washer Rent or purchase a pressure-washer and use it to clean extremely dirty surfaces like the porch, deck, driveway, and siding. Renting a pressure washer from a hardware store is relatively inexpensive and may be the spring cleaning that is needed to brighten up the place. Be prepared for sore muscles. 5. Get a Second Opinion Homebuyers will notice details you’ve missed. Ask a friend or a neighbor for a second opinion of your home’s exterior. These sources often have good ideas to improve even the most minor details. Let them study over the picture you took of the outside, then make a list of the suggestions, and see which ones are feasible and which ones you are interested in completing.
Read More 5 Solutions for Shared Bathroom Spaces
Sharing a bathroom at times is challenging and at best is uncomplicated. Growing up, many of us experienced the necessity of sharing a bathroom with siblings or roommates during college. These experiences include the joys of a messy vanity, disheveled drawers, and regularly empty toilet paper rolls or worse a backward toilet paper roll—any of these have the potential to result in bad moods, frayed nerves, resentfulness, and bickering. Instead of a cycle of frustrations, you could take simple steps to make a shared bathroom more pleasant and livable without whittling away at your relationships. 1. Communicate In any shared space the number one secret is communication! Clear communication between everyone using the bathroom is an absolute necessity. Each person will have their own preferences and pet peeves for this joint space, and they must be respected and accounted for before you change or add any additional rules. Begin with mutually agreed upon rules, responsibilities, and non-negotiables. 2. Set schedules Have you and a sibling ever fought over who would get ready first in the bathroom? I think many of us could say we’ve been there in some form or another. Without a doubt, the most stressful is when two people need to use the space at the same time, especially when there is a time constraint. The easiest solution is time blocking who gets the bathroom when and working around and sticking to the schedule. For example, your spouse could have the bathroom from 6:00 to 6:30 on Monday mornings and from 6:30 to 7:00 on Tuesday mornings, alternating with you all week. Likewise, equality and consideration are key for maintaining a pristine bathroom for everyone to enjoy. Start a monthly cleaning schedule, with reminders for whose turn it is to do which task each week, and adjust when necessary. Be sure everyone keeps it on their phones or that it’s printed out and posted somewhere prominent. 3. Look over and under for solutions You’ve accounted for the people in your home; now it’s time to make changes to the bathroom itself. The bathroom isn’t always the most spacious room in the house, so it can help to think vertically. For example, an over-the-door towel rack can be hung from the top of the bathroom door as a space-saver. Similarly, ask yourself how you could use the space under the vanity. One way can be to divide the area under each side of the sink to store each person’s toiletries and linens. 4. Utilize practical space-saving systems There are a ton of items you can buy to maximize your space, such as individual trays for drawers (think silverware divider). The same holds true for the shower. If you have a shower caddy where space is divided or two dedicated shelves, it makes it easy for people to have a sense of their own space for their toiletries. Adding clear bins to a linen closet for medicine or bandaids keeps items together and easy to find when necessary. 5. Consider bathroom upgrades If all else fails, you could change the structure of your bathroom to accommodate whoever uses it routinely. A common example of this, space permitting, is installing an extra-wide vanity. Even better and more preferred is a double vanity with separate sinks. Either way, you’re creating room so that each person has their own space. Your home’s bathroom doesn’t need to be a battleground. With a little organization, communication, and dedication, this shared space can be the comfortable oasis it’s meant to be.
Read More-
Spring is almost here and cleaning your property will brighten your space and leave you feeling fresh. If you are listing your property or renting a space, here are some top tips to make the property ready for new energy! 1. MAGIC ERASERS These little guys are your friends for everything from walls to shoes. They even sell them in sheets now. The magic eraser sheets are perfect for cleaning showers and bathtubs. Rip one out, spray some cleaning foam on your bathtub and shower walls and start scrubbing. When complete throw your magic eraser sheet away. Another place to use a Magic Eraser is on your baseboards. Scrub off those baseboards and stair rails, then after they are dry, swipe a fabric softener sheet across the baseboards to prevent future dust and grime. 2. Dust Off Those Fan Blades The easy way to dust off tall fans and not cover yourself in dust is to get an old pillowcase and some pledge. Spray the pledge on the fan blades, slide the pillowcase over the blade and voila dust goes in the pillowcase and not your eyes. 3. Clean that Funky Smelling Washing Machine Drum This appliance is often forgotten during cleaning. Pour in some white vinegar and baking soda and run on hot for the longest cycle. Once complete the drum will be clean and smell better. 4. The AC Unit Deserves Attention To The last thing you want to be inhaling in the warmer months is dust, mold, and dirt. Grab your vacuum hose and take away all the grime on the AC unit. 5. Carpet Stains You might not have the money to rent a steam cleaner or hire a professional carpet cleaner. Do you have carpet stains that you want to remove? Spray a mixture of white vinegar and water over the stain. Next, take a towel throw it over the stain and iron over the towel with your clothing iron. After a few swipes of the iron, the stain should come up. Lastly, get your home smelling fresh. Boil hot water in a stock pot with rosemary, sweet orange, and some lemon. During the holidays substitute lemon and rosemary for cinnamon and clove. Get your home spring ready with these tips. Let us know if you have any new ideas.
Read More Prepping Your Home for Monsoon Season
Holy haboobs! Bring on the dust, wind, rain, and even occasional hail storm. This reoccurring weather phenomenon is most definitely something to prepare for, regardless of how old your home is. The Arizona monsoon season is quickly approaching, officially beginning June 15 and running through the end of September. While the rain may provide little relief from the sweltering summer heat, these storms are know to wreak havoc for homeowners. If you live in the greater Phoenix/Scottsdale areas, time is of the essence to prep and handle the potential problematic areas of your home, in order to circumvent costly and damaging repairs down the line. Follow these tips from Shea Homes to get your home monsoon season ready! 1. Check your Roof There’s nothing worse than waking up in the middle of the night to the “drip… drip… drip…” of a leaky roof. Before the monsoon rains come rolling in, inspect your roof or have a professional do it for you. Patch up any cracks or holes, and get recommendations on good roofers, just in case you need to call in the professionals. 2. Evaluate your Home’s Drainage If you’ve noticed drainage issues in your yard that cause pooling of water during a rain storm, make sure you have it taken care of before the monsoons hit. You may need to hire a landscaping company to provide a drainage solution that will keep your yard and home protected from possible flooding. 3. Seal up Any Openings If you do have drainage issues, not only can this impact the outside of your home, but it also effect the inside. Make sure to seal up any openings and cracks around the base of your home, as water can easily pool up and find its way into your home during a monsoon. Caulk any cracks and use proper weather stripping for your windows and doors, as heavy winds can also push water in. You should even consider gap filler near your home’s foundation to prevent issues with mold and mildew. 4. Ensure Rain Gutters and Downspouts are Installed and Free of Debris Rain gutters and downspouts are the best way to direct the rain that comes from monsoon microbursts or macrobursts away from your home. Don’t wait until it’s too late to make sure yours are ready to do their job and divert the rain away from your home’s foundation. 5. Prep Plants and Trees Protect your plants (and your home!) by preparing in advance. Trim any big tree branches that could snap off and damage your roof. Stake down young trees that might not make it through an intense storm. And remember, the heavy monsoon rains that often come before the strong winds can loosen the soil and make trees more prone to becoming uprooted. 6. Be Familiar with Your Home’s Electrical Panel The last thing you want during a power outage is to be stumbling around in the dark because you do not know where your breaker panel is. It is important to not only know where it is, but it be familiar with your home’s electrical panel. Make sure to take the time to familiarize yourself with your electrical panel and to have all your circuit breaker switches clearly marked. 7. Make Room for Your Car(s) in the Garage Now is the perfect time to put the family to work and clean out that over-stuffed garage. Parking your car on the street or in the driveway could put it at risk during the monsoon storms since flying branches and falling trees are common occurrences when the wild weather comes to town. Make room in the garage for your car and keep it safe from flying objects, as well as hail, rain and wind. For more information on monsoon season in Arizona, visit http://www.monsoonsafety.org/.
Read MoreCrisp and Clean: Our Top Picks for White Paint Shades
Choosing a white paint color may seem like a straightforward task, but in reality, it can be a challenging decision. White paint colors have an incredible range of undertones, including cool blues, warm yellows, and neutral grays. The subtle variations in these undertones can have a significant impact on the overall look and feel of a space, making it difficult to choose the perfect shade. Additionally, natural and artificial light can affect how a white paint color appears, further complicating the decision-making process. It can take multiple samples, swatches, and test patches to determine which shade of white will best complement the room's lighting, decor, and intended mood. Overall, choosing the perfect white paint color requires a keen eye for detail and a willingness to experiment until the ideal shade is found. Below is a tried and true list of our favorite white paint colors for walls, cabinets and trim. White Pickett Fence by Dunn Edwards- A crisp white paint that stands the test of time. Alabaster by Benjamin Moore- This bright, fresh white has a slightly gray undertone that softens it. Alabaster by Sherwin Williams- This neutral has a very slight cream undertone, making for a versatile shade. Cloud White by Benjamin Moore- A true classic white that is bright with slightly warmer undertones. Decorator's White by Benjamin Moore- This is a bright white that has a slightly cooler undertone. Fleur de Sel by Sherwin Williams- This cool-toned grayish color is a great addition to an off-white choice. Oyster White by Sherwin Williams- This creamy white with soft, green-beige undertones makes this hue both stylish and calming. Pure White by Sherwin Williams- This versatile bright white, with the slightest yellowish undertone, keeps it from appearing too stark. Simply White by Benjamin Moore- This classic white is crisp with a hint of warmth. Skimming Stone by Farrow & Ball- This stony off-white is clean and contemporary. Strong White by Farrow & Ball- This neutral has light gray undertones that are great when you don't want stark white. Whisper by Dunn Edwards- Whisper is a bright, warm white that looks great in a satin finish. What is your go-to white? Send us a message with your preferred color and company!
Read MoreCountertop Surfaces: Exploring the Pros & Cons
When it comes to choosing the right countertop surface for your kitchen or bathroom, there are several options available, each with its own set of advantages and disadvantages. In this blog post, we will delve into the pros and cons of six popular countertop surfaces: Silestone, Caesarstone, quartz, marble, granite, and concrete. By understanding the characteristics of each surface, you can make an informed decision that aligns with your needs and preferences. 1. Silestone: Composed of Quartz and Resin Pros: durable, low maintenance, non-porous, wide range of colors and designs Cons: prone to chemical damage, vulnerable to direct heat Average Cost: $60-$140 2. Caesarstone: Composed of Quartz and Resin Pros: durable, low maintenance, non-porous, consistent patterns Cons: prone to chemical damage, vulnerable to direct heat Average Cost: $75-$125 3. Concrete: Composed of Cement and Sand Pros: customizable design, heat resistant, unique aesthetic appeal Cons: prone to staining, vulnerable to cracking, time-consuming installation Average Cost: $60-$150 4. Quartz: Natural Stone Pros: durable, low maintenance, wide range of styles Cons: expensive, sensitive to UV light and staining Average Cost: $75-$150 5. Marble: Natural Stone Pros: elegant and timeless appearance, heat resistance, value appreciation Cons: porous nature, susceptible to scratches and etching, higher maintenance Average Cost: $40-$180 6. Granite: Natural Stone Pros: durable, wide variety of colors and patterns Cons: porous nature, vulnerable to cracking and scratches, susceptible to watermarks Average Cost: $40-$140 Choosing the right countertop surface involves considering a range of factors, including durability, maintenance requirements, aesthetic preferences, and budget. By weighing the pros and cons of each option, you can make an informed decision that aligns with your specific needs, lifestyle, and budget. Whether you prioritize durability, elegance, or customization, there is a countertop surface available to elevate the functionality and style of your space. * Average costs are for materials and installation, and vary widely. These numbers are estimates. Costs may be lower or higher, depending on quality, craftsmanship, and labor.
Read More
Recent Posts